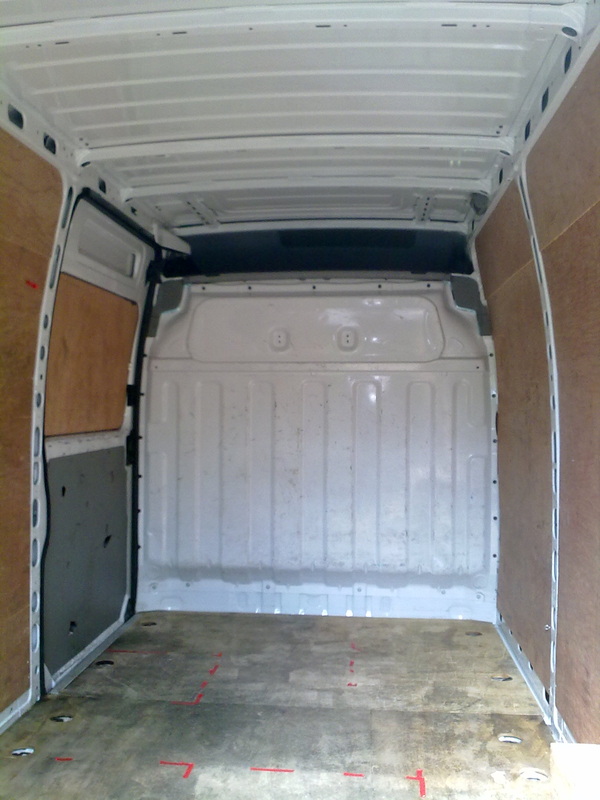
 Clearly .it is important to be able to move from the front seats ,to the living area of the van,and vice versa,without getting out of one door and getting in through another .Fortunately the metal bulkhead is easily removable. In this picture you can see I have started experimenting with a provisional layout defined by red sticky tape on the floor. 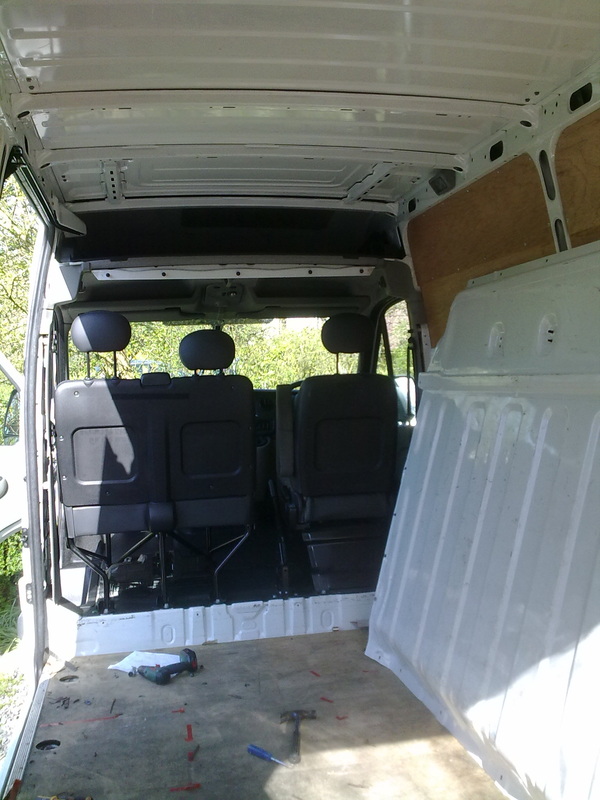 Bulkhead removed
The light is greatly improved,immediately.We have sacrificed the protection given to the driver and passenger from loose bits of load flying forward in an accident,but the furniture I will build will restore some of this safety barrier.Once the windows are cut in the back,the driver will also be able to see backwards while reversing.The windscreen has a slot for a rearview mirror to be added,any Renault mirror will fit.I got a Renault Scenic one on Ebay for a fiver. Having thought about it,I think it is best to get some help in for certain aspects of the build.My joinery skills are pretty reasonable,but I would hesitate to install an all singing and dancing 240 V/12 V electrical system.Also a no-brainer is that the installation of the gas tank and the plumbing of the gas piping needs to be done by someone with experience.Surprisingly,regulation and certification of the gas installation is only needed if you are going to hire out your van.Otherwise you are able lawfully to DIY it.But I'm not going to mess with the gas.
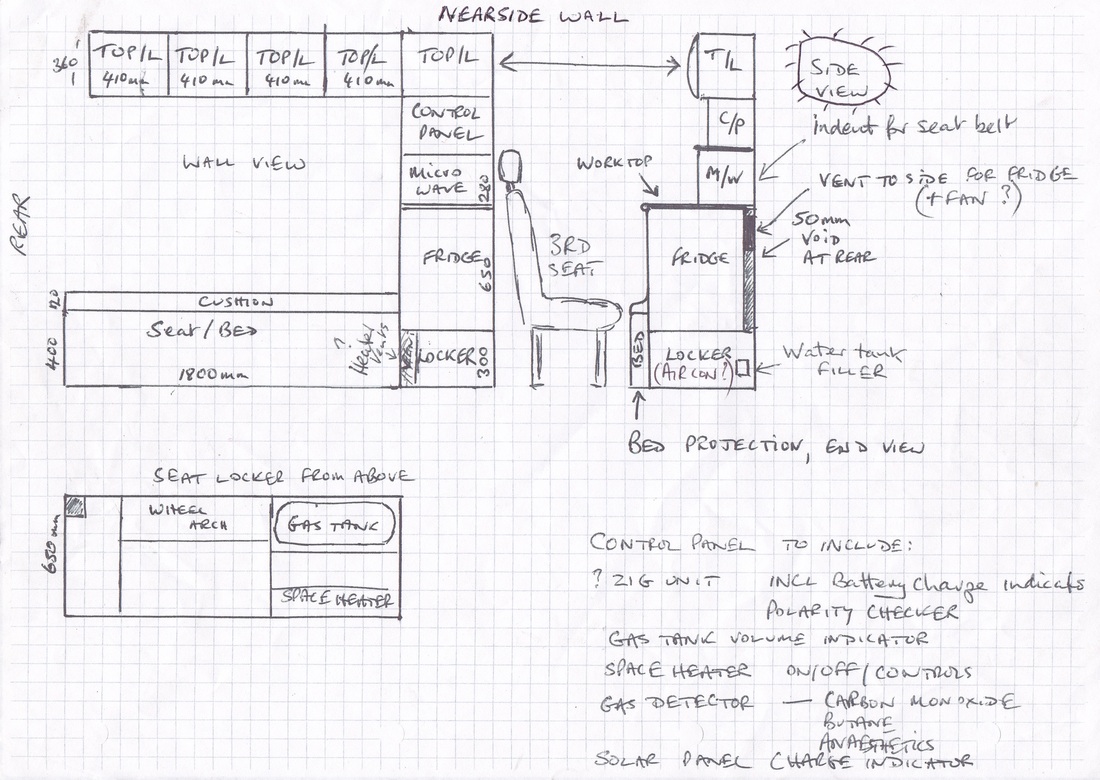
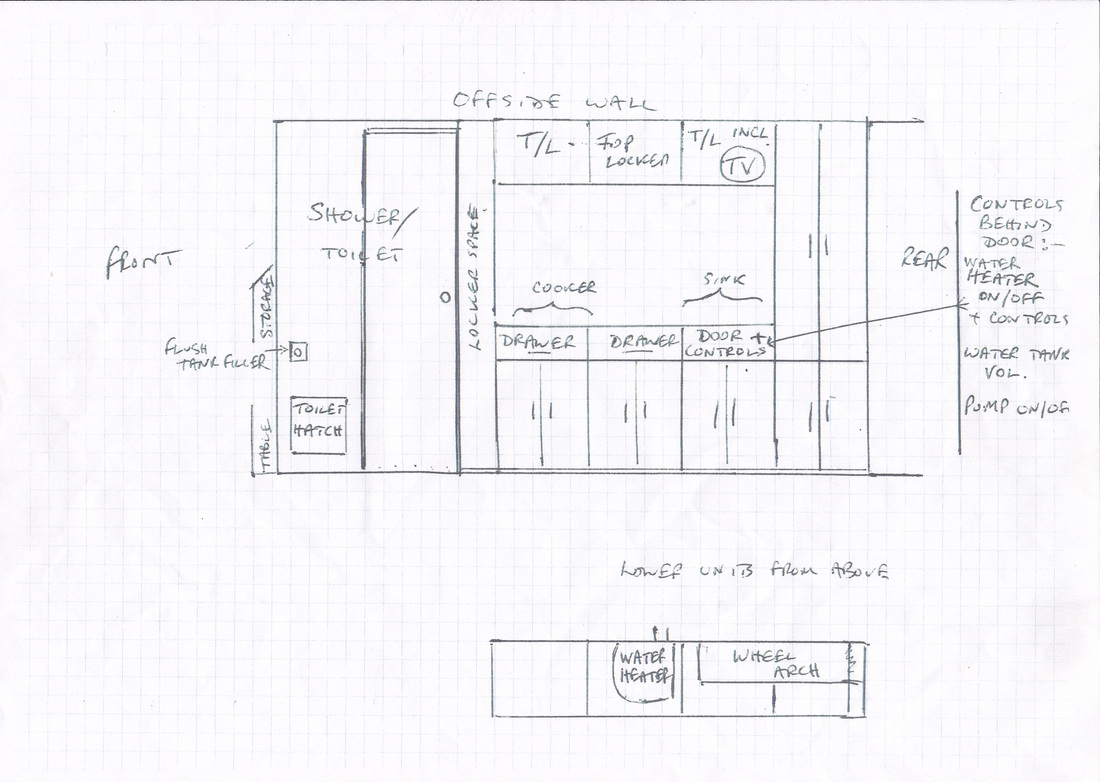
Finally.I'm too chicken to cut the big holes in the walls of the van for the windows,and in the roof for skylights.It is perfectly possible for the amateur do do all of this.The van walls are thin,and you just need a jigsaw,and some special glue to stick the glass over the holes.But I don't want to risk disaster! One consideration when getting some paid help in is that your conversion will end up costing a fair bit more,so to keep within some sort of budget I have decided to ration the help to the essentials mentioned above,and I will try to do the rest myself I will get the windows professionally fitted. And for all of the help for the rest of the conversion,I have arranged for Jason Hunter, of West Country Camper Conversions ,in Clutton, to do all the things i don't dare to, 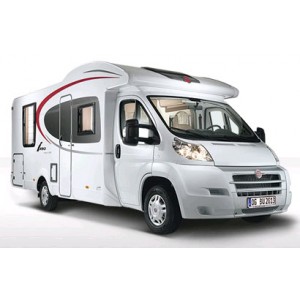 a Glaring Pantechnicon of a vehicle:stands out like a sore thumb screaming"tourist" a Glaring Pantechnicon of a vehicle:stands out like a sore thumb screaming"tourist" It seems that virtually anything is possible when doing a self-build camper conversion.The reason for doing your own conversion as opposed to buying a professionally coach-built campervan is that you can choose exactly what goes into it ,the layout ,and level of luxury,but the overall aim is to get this done more cheaply than it would cost to have done professionally,or if simply buying an off -the -peg vehicle.That is,unless the main aim of the exercise just is the exercising of DIY skills The danger is that you risk getting carried away by the mass of equipment available for self-builders to install in their vans, and end up spending the same,or more,and expending a lot more time and energy ,than would have been the case when buying a ready made camper.There are online shops selling self build enthusiasts absolutely everything they could ever wish for. So what level of tech to install? An important element for me was to create a "stealth" van,i.e a van containing enough elements needed for reasonable comfort inside,while from the outside retaining the appearance of a basic white van so as not to attract attention when parked overnight in town streets and supermarket car parks.I wanted to avoid the many hatches and flaps,filler taps ,exit taps,vents and exhausts,double glazed obvious "camper" windows,and especially, swirly logos that you see on the sides of all commercially made and many self-build campers. 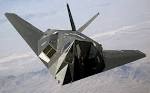 Stealth Fighter-the inspiration! Stealth Fighter-the inspiration! The van will have to be equipped to provide some comfort during city breaks or trips in the cooler months,and also provide facilities to survive with enough power and heat,without mains hook-up if free-camping a couple of days.But also to have hook-up facilities to enable generous power usage if on a campsite. All camper vans need seats,and a bed;usually the one converts from the other. And cooking facilities:I wanted a kitchenette with gas hob,and kitchen sink,fridge and a microwave to add some versatility to the cooking (adds the option of microwaveable ready meals,including frozen ones if the fridge has a freezer compartment, to provide a reasonable standard of cuisine !) To ensure comfort while camping away from sites I want a separate washroom cubicle,with sink and shower,and featuring a cassette toilet for ease of emptying.For hot water for the kitchen sink I suppose you could just boil water in a kettle for washing up-but because of the shower/washroom I will need a proper water heater and so aim to fit one. Finally I want some air heating as well ,to keep warm in cooler times of year. 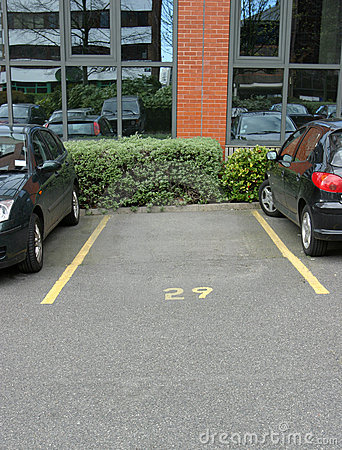 The imaginary success of a Stealth camper-hiding in plain sight !! The imaginary success of a Stealth camper-hiding in plain sight !! From my experience I would stress that it is really important to spend loads of time both inside and underneath your empty van measuring,measuring and measuring again,while browsing all the kit available online,to check what will fit,while keeping enough space for the all-important 6 foot bed/bench seat and table.
Everything you choose needs its site planning extremely carefully.For example gas or diesel heaters need exhaust vents,often through the floor of the van if you are aiming to avoid cutting big holes in the walls.Any compartment in the van where there is gas appliance needs a "drop-out" hole so that any leaking gas will exit the van.Using gas means you need to think of your supply-do you use freestanding disposable propane ?(eg campinggaz),or refillable "gaslow" LPG on board bottles,or an under-slung LPG tank? Do you put your fresh water tank on-board(less likely to freeze in really cold weather but takes up considerable space) or under-slung beneath the van(a better centre of gravity,less precious space taken up inside the van,and it is possible to get an anti-freezing heater to winterize an under-slung tank if you are planning ski trips,for example) Invariably,the first place you think of placing an item turns out to have a piece of chassis underneath just where you would need to place a necessary drain or water/gas intake through the floor,or a piece of bulkhead just where you would need cut a vent through the wall. Your under-slung fresh and waste water tanks,and gas tank ,will add to your fuel tank, vehicle cabling ,chassis structures and spare wheel under your van to create a whole host of "no-go" areas for drilling holes through the floor above ! All this needs very careful planning, and careful studying of the exact dimensions and schematic diagrams of appliances you are thinking of purchasing. I am now a White Van Man, and proud of it!
I realised there is much to consider in the area of insurance and also regarding registration with the DVLA. Despite the reputation of white van man as a driver ,white vans are relatively cheap to insure as statistically they are less likely to have an accident than a private car. There are some issues when deciding to insure a self-build campervan as you will be(hopefully!) turning it from a goods vehicle into a campervan(or "motor caravan" in DVLA parlance),over a number of months.You need to insure with one of the specialist insurers who factor this in.Several are found easily on the internet. I got a no hassle quote from Shield Insurance,for a price cheaper than my car,including cover for 3 months per year anywhere in Europe*, with Europe wide breakdown cover included*.Extensions to these time periods are easily obtained but you just need to pay an additional premium.3 months per year should suit nicely as I plan to be in Europe for part of this insurance year,and part of next. *(NB this was pre-Brexit,when any EU domestic insurance covered the bare minimum legal insurance, (i.e third party damage )automatically in other member states.Things may change on this .Another issue that only became apparent later was that while this (fully comprehensive) insurance did allow for driving in non EU European countries so long as you warned the insurers and paid a small additional fee and a "Green Card" was provided for me by the company,the breakdown cover did not extend to some countries outside the EU . I then had to buy an additional European breakdown policy from the AA which did cover non-EU countries (such as Montenegro,Serbia,Albania etc),as well as the EU.Having a Green Card was vital outside the EU:I had my papers checked at several police roadside checkpoints and borders, notably in Bosnia and Albania,and my Green Card ,indicating adequate insurance,was scrutinised closely) The only issue is that the insurance policy from Shield stipulates that my conversion must be completed in 3 months,with photographic evidence.Complete means being re-registered by the DVLA as a "motor caravan",and for this one needs certain minimum requirements to differentiate your conversion from an ordinary white van that you might simply camp in the back of. There actually seem to be some other compelling advantages for getting your van re-classified anyway:The following is lifted from www.campervanlife.com/building/legal Why re-register as a "Motor Caravan"? Although you do not legally need to re-register a campervan conversion, here are the benefits of doing so:-
The one thing that I would add to this is that very occasionally campsites of the smarter type get a bit shirty if you turn up in what looks basically like a white van,and ask you to prove that you are registered as a motorhome. This has actually only happened to me once(in Finland). So,for a vehicle to qualify as a 'Motor Caravan' in the eyes of the DVLA the following permanent fixtures must be present,and you have to send photographic proof of compliance to the DVLA with the re-registration application:-
Wow! ,3 months to completion sounds pretty optimistic to me ,but that's the challenge............At least the van's got some rear doors and a sliding side door so that's item number 2. down ! 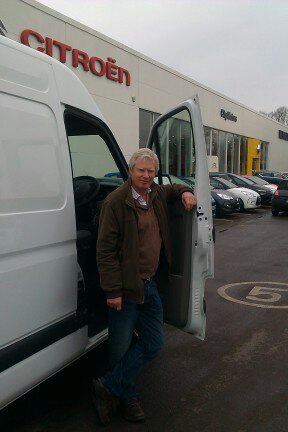  On a rainy April morning in a Bristol industrial estate...the story begins.
Courtesy of City Motors, one Renault Master ,Long wheel base, Special Edition ,LM35dci 120 Extra,Medium roof van. No,not a Transit to get lost in,after all. How to choose a white van to convert to a camper? I wanted something I could stand up in comfortably,and with length less than 6m,thus not too hard to manoeuvre (and apparently a useful cut-off length for certain ferry booking price structures.) It needed to be bog-standard white(both for anonymity/stealth ,and cooler in hot weather) The choice is not as wide as you might think.A Ford Transit was the original inspiration -but If you want something you can stand up in,then a Transit turns out not to be much use, as they have a high floor,hence not very good headroom,unless you go for the ultra high top.Renault Masters,Opel(Vauxhall) Movanos and Nissan Interstars are all the same van,made in the Renault factory.They have good headroom(about 1.9 metres) ,even in the medium height version.You see a lot of Renault Master minibuses and ambulances about-presumably for this reason. Should also have good parts availability in Europe?,... we'll wait and see on that one. The Special Edition Extra comes with reversing sensors,really handy for someone not used to reversing a long wheelbase van, and aircon.... surprisingly rare in white vans and could come in handy in hotter climes. The professional convertor's favourite ,I later learnt,is actually the Fiat Ducato/Peugeot Boxer(again ,one and the same van),as they have the widest loadspace area and you can just fit a 6 foot bed crossways across the van .Another advantage of the Ducato is that the spare wheel is slung under the chassis as a standard.The panel van version of the Master comes with it strapped in the load area,and I had to later have it specially underslung.The third doppelganger van available is the Mercedes Sprinter/Volkswagen Crafter,tends to be good Germanic quality ,popular,but a little more pricey than its competitors. Anyway,a suitable Renault Master turned up,local,from a reliable main dealer ,"one careful owner" ,70,000 miles on the clock and just 3 years old,so we were off............... |
Renault Master campervan self-build Archives
August 2015
Categories |
 RSS Feed